Jewelry Packaging Design Guide: Boxes, Inserts, Materials, and Unboxing
The complete design guide for jewelry brands
How should jewelry brands approach packaging?
Design packaging as a collection system, not one box at a time. Define the material family, finish discipline, logo behavior, and lining standard first, then adapt the structure by product type. The constants (brand color, opening experience, interior quality) should not change across formats. Only dimensions and structure should vary. Plan 12–20 weeks from brief to delivery.
Jewelry packaging design is the process of building a complete packaging system around the product: the box, insert, material, closure, finish, and unboxing sequence. For jewelry brands, the goal is not just protection. The packaging has to make small, high-value pieces feel intentional, giftable, and consistent across every SKU.
Key Takeaways
- Jewelry packaging should be designed as a collection system, not one box at a time.
- Ring boxes, earring cards, necklace boxes, bracelet boxes, and gift sets each need different structures and inserts.
- Materials like rigid board, PU leather, linen, velvet, and specialty papers create the tactile language of the brand.
- The best jewelry unboxing is controlled: the piece is secure, visible, and easy to remove without feeling fragile.
- A complete design brief should define product dimensions, channels, materials, finishes, quantities, timeline, and approval owners before sampling starts.
Related reading: packaging brief template, custom packaging timeline, packaging finishes guide, unboxing experience design guide, jewelry packaging page
What Should Jewelry Packaging Design Actually Solve?
Jewelry packaging has three jobs: protect the piece, frame the value, and create consistency across the product line. If it only looks pretty in a render, it is not done. It has to hold the product correctly, ship safely, photograph well, and feel like the same brand when a customer owns multiple pieces.
The challenge is scale. A brand may start with one ring box. Then earrings, necklaces, bracelets, pendants, seasonal sets, retail trays, and influencer kits appear. If those formats are designed one at a time from catalog options, the brand slowly loses cohesion.
Good packaging design prevents that drift. It defines the material system first, then adapts the structure by product type. That is how a collection starts to feel designed instead of assembled.
Which Jewelry Packaging Formats Do Brands Need?
Ring boxes
Ring boxes need vertical protection and a presentation moment. The ring should sit upright, centered, and easy to remove. Common formats include hinged rigid boxes, clamshell boxes, drawer boxes, and compact lift-off boxes. The insert matters as much as the exterior because the ring is the hero.
Earring packaging
Earrings can work in small rigid boxes, cards, trays, or pouches depending on price point. Studs need a stable card or cushion. Hoops need room so they do not bend or scratch. Premium earring packaging usually benefits from a shallow tray so the pair is visible immediately.
Necklace and pendant boxes
Necklace packaging has to prevent tangling. That means loops, tabs, elastic, or a shaped insert that controls the chain. A beautiful box that lets a chain knot during shipping creates a bad first impression before the customer even touches the piece.
Bracelet boxes and gift sets
Bracelet packaging needs more width and often more cushion support. Gift sets create a larger story: pouch, care card, certificate, polishing cloth, and product can all sit in one system. But every added item should earn its place.
How Do Materials Shape the Jewelry Packaging Experience?
Materials do more than change cost. They decide what the customer feels before the jewelry is touched.
PU leather signals classic jewelry presentation. Linen feels softer and more modern. Velvet adds softness and intimacy, especially inside the box. Specialty paper can feel editorial and lighter, which works well for DTC brands that want premium without heavy old-world cues.
Rigid board creates structure and weight. Paperboard works when the product is lower price point or when shipping weight matters. Molded fiber can work for trays, inserts, and sustainability-forward kits, but it has to be paired carefully with the brand aesthetic.
What Finishes Work Best for Jewelry Boxes?
Jewelry packaging usually does not need every finish. It needs one or two controlled details that match the product.
Foil stamping works well because jewelry already carries metal language. Gold, silver, rose gold, black foil, and blind deboss all create different brand signals. Embossing and debossing add tactility without making the design loud. Soft-touch lamination works for paper-based boxes that need a smooth hand feel, but it can scuff if the material or freight environment is wrong.
The strongest jewelry packaging often uses restraint: clean exterior, precise logo, rich interior, and a product presentation that feels deliberate. The box should support the jewelry, not compete with it.
How Should Jewelry Brands Design the Unboxing?
The unboxing sequence should be simple. Open. See the piece. Understand the brand. Remove the product easily. Anything that interrupts that flow creates friction.
The reveal moment matters most. The customer should not open a box and see tissue paper hiding the product, a loose pouch, or a piece that shifted in transit. The insert should guide the eye to the jewelry. The brand message should support the moment without turning into a brochure.
For DTC brands, the shipping box also matters. A premium jewelry box thrown into a plain mailer with no protection creates two different brand experiences. The outer packaging needs enough structure to protect the inner moment.
What Mistakes Make Jewelry Packaging Feel Generic?
The most common mistake is starting with a catalog. The second is copying another jewelry brand too closely. The third is designing the outside and ignoring the insert.
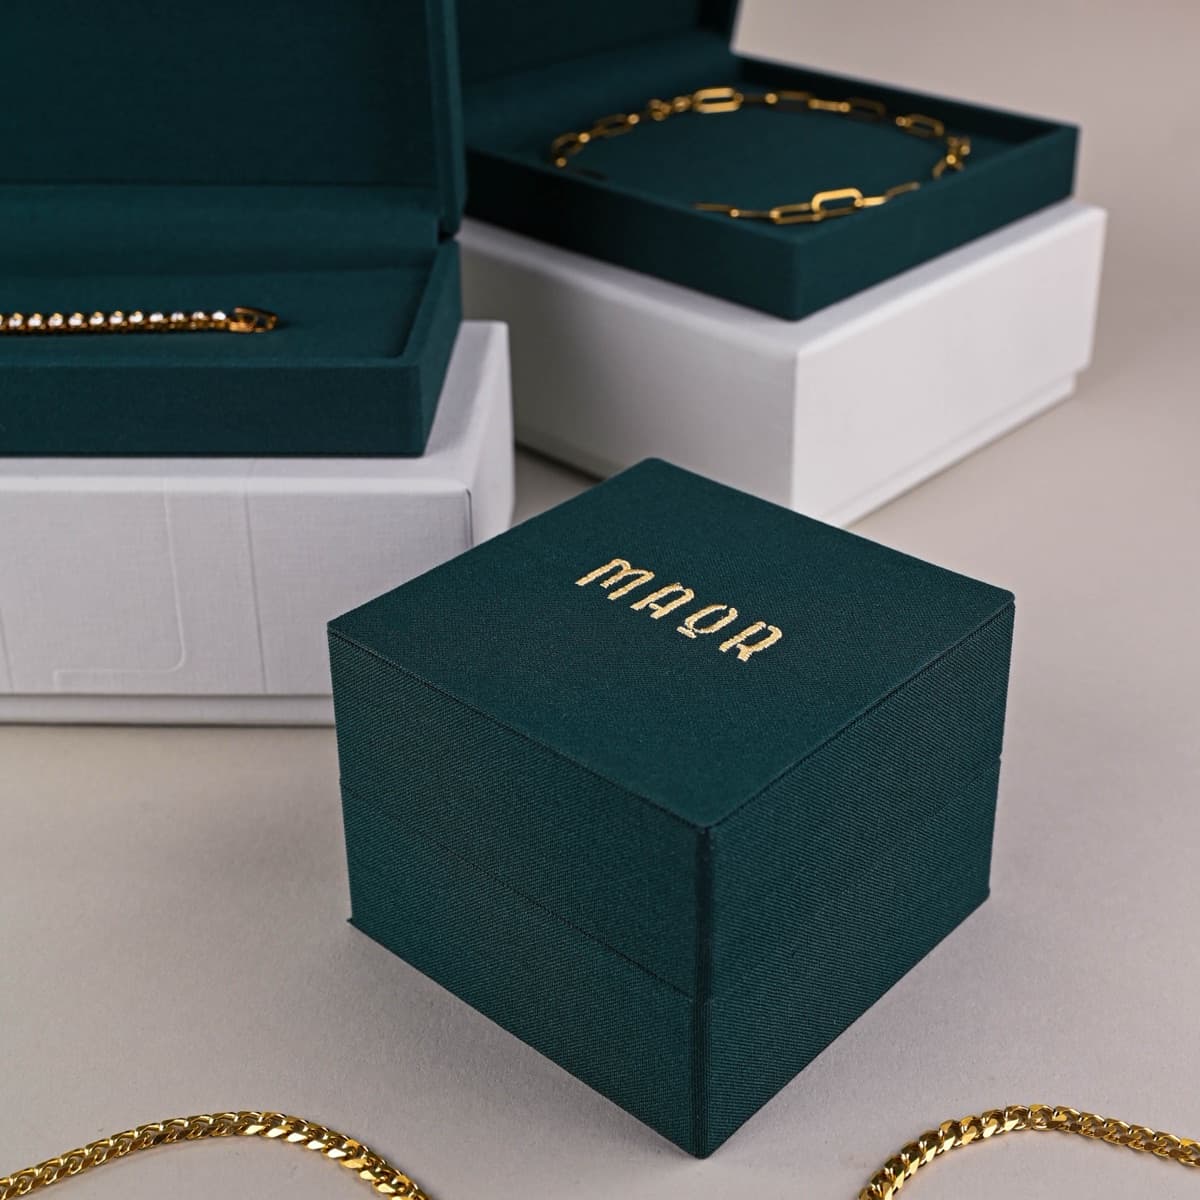
A ring box, necklace case, and bracelet box can all look good alone and still fail as a collection. That is the real design problem in jewelry: consistency across formats. Same material family. Same finish discipline. Same logo behavior. Same level of care inside the box.
How to Build a Cohesive Jewelry Packaging System
Start with the product map. List every product type the brand sells today and every format it expects to add over the next 12 months. Rings, earrings, necklaces, bracelets, pendants, gift sets, travel pouches, repair kits, care cards, retail trays. The packaging system has to anticipate the collection, not just the next SKU.
Then define the constants. Constants are the things that should not change across formats: brand color, logo placement logic, lining family, exterior material family, finish style, and opening experience. The dimensions can change. The structure can change. The feeling should not.
This is where many jewelry brands get stuck with catalog packaging. Catalog options are selected one at a time. A ring box may look fine. A necklace case may look fine. A bracelet box may look fine. Together, they do not behave like one brand.
Build Around the Product, Not the Box
The piece decides the insert. A ring needs lift and visibility. A necklace needs anti-tangle control. Earrings need balance. A bracelet needs space and support. If the insert is wrong, the box is wrong.
The best design reviews include the real product, not a placeholder. A CAD drawing or sample piece is helpful, but jewelry often behaves differently in hand. Chains shift. Hoops rotate. Rings sit at different angles depending on band thickness. The packaging needs to control those details without making removal annoying.
Design for Photography and Fulfillment
Jewelry packaging is content. It appears in unboxing videos, product photography, retail counters, gift moments, and customer posts. That does not mean every package needs a dramatic reveal. It means the surfaces, logo, and opening sequence should be camera-aware.
Dark materials can look premium but show dust and fingerprints. Glossy surfaces can glare. Velvet can photograph beautifully but collect lint. Foil can look rich in person and disappear on camera if the angle is wrong. These are not reasons to avoid those materials. They are reasons to test them.
Fulfillment matters too. If a team needs 90 seconds to assemble each box, the packaging will create labor cost. If inserts are hard to load, fulfillment errors increase. If the box requires tissue, pouch, card, sticker, and sleeve for every order, build that labor into the economics.
Common Jewelry Packaging Design Mistakes
The first mistake is designing for the founder’s desk instead of the customer journey. A box can look beautiful in a conference room and still fail in shipping, retail, or fulfillment.
The second mistake is overbuilding the first custom run. Brands often stack materials and finishes because they want the package to feel premium. Premium usually comes from discipline. Clean structure. Better material. Tighter insert. One memorable finish.
The third mistake is ignoring reorder reality. A package that requires a rare material, long tooling window, or fragile assembly process may be hard to reorder quickly. Jewelry brands need packaging that can be beautiful more than once.
The Approval Checklist
Before production, review dimensions, product fit, insert tension, opening experience, logo placement, color match, lining quality, exterior scuff resistance, carton packing, and freight assumptions. For retail, add barcode area, tray fit, and master carton requirements.
A good approval process catches problems before inventory exists. That is the point. Once thousands of boxes are produced, every small issue becomes expensive.
How to Review Jewelry Packaging Samples
Sample review should be physical, not theoretical. Hold the box. Open it ten times. Load the product. Shake it gently. Photograph it. Put it under bright light. Put it next to the rest of the collection. Then decide.
Start with structure. Corners should be clean. The lid should fit evenly. Hinges should open without wobble. Drawer boxes should slide smoothly but not loosely. Magnetic closures should feel secure without forcing the customer to pull too hard.
Then review the insert. The product should not shift in transit. Rings should sit upright. Earrings should feel balanced. Necklaces should not tangle. Bracelets should not compress. The insert should make the product easier to appreciate, not harder to remove.
Then review materials and finish. Color should match the approved standard. Foil should be crisp. Embossing should align. Lining should be clean and free from glue marks. If the package uses PU leather or fabric, check how it behaves at corners and edges. Those are the first places weak production shows.
Designing for Multiple Price Tiers
Not every SKU needs the same box. A $60 charm, a $250 necklace, and a $2,000 engagement piece should not automatically share the same packaging cost. They can share the same brand language while using different structures.
The best systems have tiers: a lighter format for entry products, a core rigid format for mainline products, and a premium or gift format for special collections. The materials and visual language stay connected. The cost structure changes by product role.
This is how jewelry brands avoid overpackaging low-margin SKUs and underpackaging high-value moments. The customer still feels one brand. The business gets a packaging system that can scale.
Jewelry Packaging Design Guide FAQ
Build Jewelry Packaging That Matches the Product
Jewelry packaging carries more responsibility than most categories. It protects the piece, frames the value, and turns a small object into a complete brand experience. If you’re planning a new jewelry box, retail-ready format, seasonal gift set, or full packaging refresh, start with the structure, material, volume, and channel requirements before chasing finishes.
When you’re ready to pressure-test the direction, book a jewelry packaging consultation. We’ll give you a straight read on format, cost, MOQ, timeline, and what should be solved before the first sample is made.
Jordan Harper is the founder of Logic Pac, a custom packaging development firm helping beauty, wellness, jewelry, and luxury goods brands design packaging that looks premium, protects the product, and works in production.
Questions to Ask Before You Quote This Project
A jewelry packaging quote should answer more than unit price. Ask the supplier which material will be used, what the MOQ is by size, what tooling is required, how color will be matched across the full collection, how inserts will be approved, what freight method is assumed, and what happens if the production sample fails approval.
Ask for the landed-cost view, not just the factory cost. A box that looks cheaper before freight can be more expensive after dimensional weight, storage, rework, and rush shipping. Jewelry packaging is small, but it is often component-heavy. The more components in the system, the more important the quote discipline becomes.
Also ask who owns the final production checklist. The checklist should include material, color, lining, hardware, logo placement, insert fit, carton labeling, shipping carton specs, and acceptable defect tolerance. If those details are not defined before production, they become arguments after production.
How to Use This as a Packaging Brief
Turn the article into a brief before you ask for pricing. List the product formats, dimensions, materials, inserts, finishes, order quantities, launch date, sales channel, shipping method, and target landed cost. Then separate what is required from what is optional. Required items protect the product and brand. Optional items are where cost can be adjusted without damaging the experience.
For jewelry brands, the most important brief detail is the full collection map. A supplier needs to know whether this is one ring box or a system across rings, earrings, necklaces, bracelets, pendants, and seasonal kits. Without that map, the first sample can look good and still fail the collection.
Also include approval owners. Jewelry packaging often gets reviewed by founders, brand, product, retail, and operations. If those people review samples one at a time, the project slows down. If they review against the same brief, decisions get cleaner.
Ready to Start Your
Project?
Tell us your launch date and we’ll map the packaging timeline backward.